Many people who use the Cricut machine are actually very fond of using a Cricut cutting mat now and then to cut something without damaging anything else. However, the sad part is that the constant use of the cutting can develop visible cuts, grooves, and warps. And after seeing this many people, they usually replace the mat with a new one. But what if I tell you that you can reuse the cutting mats by properly cleaning them, which saves you both time and money? Is this new insight exciting you for learning some easy ways to clean a Cricut mat? If you say yes, then you are at the right place because, in this guide, we will explore how to clean a Cricut mat using different but effective methods.
How to Clean a Cricut Mat?
If your cutting mat is looking kinda worn out or worse than that, then it means it’s time to give it a proper cleaning treatment before you decide to replace it. Performing a clean-up can definitely increase the lifespan of your mat and save you additional costs. Follow the steps below to ensure you get the most out of the mat before the replacement.
Step 1: Remove the Dirt
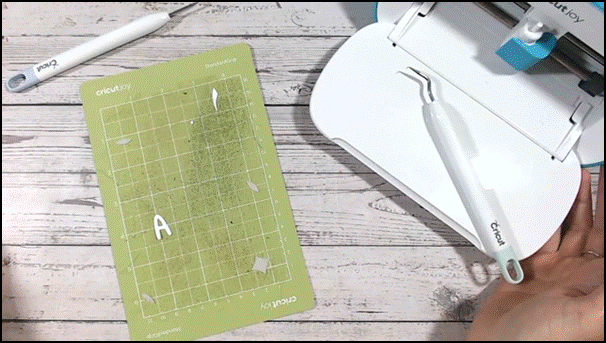
The first thing we need to do is remove as much dirt from the cutting mat as possible. Use any tools you like: a brush, the edge of the ruler, or anything. For the moment, our only goal is to remove as much dirt as possible from the mat before moving on to the next step.
Note: In this step, we need to focus on cleaning up the dirt that is stuck on the mat without scratching the adhesive. If you do so, the mat will lose its stickiness, which is important for a cutting mat.
Step 2: Use a Sticky Lint Roller
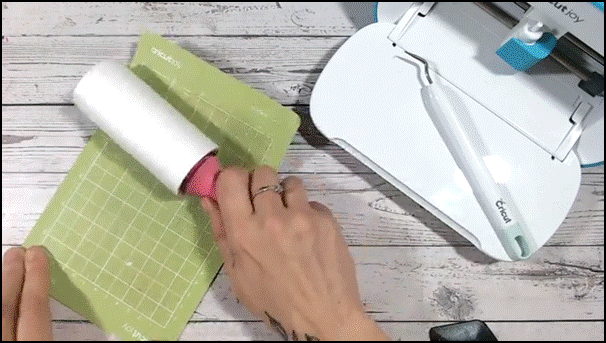
Once you have completed removing the dirt, then the next step will be to use a sticky lint roller. Start by rolling over the whole surface of your mat to remove any dust, glitter, and particles from the mat. However, it is important to roll in the direction of the grain of the paper. Make sure to do it right; otherwise, you’ll end up removing the adhesive from the mat. But, if you are using a new sheet of sticky paper for the roller, first roll it over the cloth to reduce the tackiness.
Step 3: Wipe It Down

Regardless of using the previous steps to clean a Cricut mat, if you are still unsatisfied with the result, then you can perform this step. In this step, we will be using the wet wipes to clean the mat surface. However, you can’t use just any wipes – avoid using wipes with alcohol content and preferably use water-only. You can easily find it in any supermarket in the baby care section. Just rub the wipes until you are satisfied with dirt removal.
Additional Step
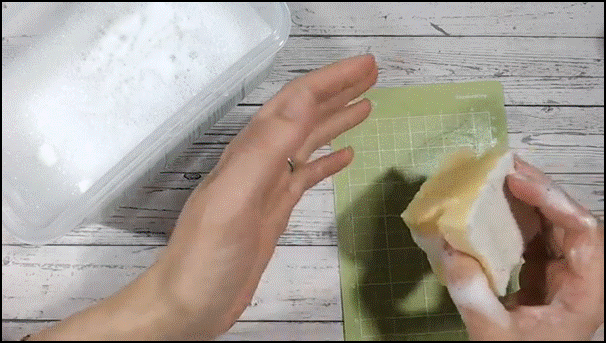
Perform this step if you are not satisfied with the result of any previous step because this step involves complete washing of the cutting mat. Use warm water, some soap, and a soft sponge. More importantly, avoid using the scrubber because it can damage the layering of the adhesive on the mat. Also, don’t put too much pressure while washing, and work on the smaller circle to clean thoroughly and focus on more worn areas.
Useful Tips for Clean Cuts on Cricut Mat
Follow these tips to make sure you make clean cuts while working on your project and make good use of the Cricut mat:
- Check your blade: Make sure your blade is free from any small fibers. You can also remove the blades from the machine. Use tweezers to remove any fibers, but also be careful not to touch the blades because it can cause injury to you.
- Use different areas on your mat: It also feels tempting to use the usual side of the mat (depending on person to person). However, by doing this, you can easily avoid the creation of a worn area on your mat.
- Choose the correct cardstock and pressure: Lastly, make sure you choose the right cardstock for your project. Also, remember not to use too much pressure on the mat while cutting.
Conclusion
In the end, we hope you find this guide on ‘how to clean a Cricut Mat‘ helpful and informative. So, next time you ever think of replacing your Cricut mat, take a look and ask yourself whether it is necessary to replace it or if it can be cleaned. If you can clean it, then consider our steps to clean a Cricut mat properly. Additionally, use our useful tips to avoid causing too much damage to your Cricut mat and ensure you make great use of the mat before the replacement.