If you use a Cricut machine, regardless of whether you are a hobbyist or a professional crafter, there is a very high possibility that you have heard about the feature named “Print Then Cut.” But have you ever wondered, “What is Print Then Cut in Cricut?” or “How to Print Then Cut on Cricut” If yes, but you couldn’t find the exact answer, then this guide is just for you because we will explore the Print Then Cut feature in this guide. So, without further delay, let’s dive into this.
What Is the Print Then Cut Feature?
Print Then Cut is a feature that allows you to create designs in Cricut Design Space and then print those on your home printer. Later, load the prints into your Cricut machine (Explore, Maker, or Venture) for cutting. The machine automatically scans your print or marker through the sensors. Lastly, cut them with precision to achieve accurate and clean results. This feature is very useful if your process is handled correctly, allowing you to create a variety of products like stickers, toppers, and other cutouts.
Requirements to Use the Print Then Cut Feature
If you are fascinated by the Cricut Print Then Cut feature, then continue reading because, in this section, you’ll learn what things and standards you have to meet to use the Print Then Cut feature.
1. A Smart Compatible Cricut Cutting Machine
Before you begin practicing Print Then Cut, first make sure the machine you are using is compatible with the Print Then Cut feature. For reference, here are some Cricut series names:
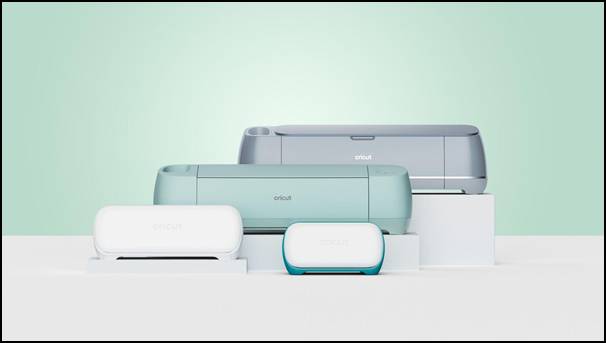
- Cricut Joy Xtra
- Cricut Explore machines
- Cricut Maker machines
- Cricut Venture machine
2. A Smart Compatible Printer
Select a fully functional printer model. However, there is no such obligation to choose or prefer any of the specific ones. But here are some tips for choosing a printer that will work for you:
Inkjet Printer (Recommended)
- They use ink cartridges and have smaller dispenser nozzles. This makes the ink ejection more refined and sharp (This helps the machine sensor track the print layout for cutting accurately).
- Inkjet printers are versatile and best suited for a wide range of printable materials, including sticker paper, printable vinyl, printable iron-on, etc.
Laser Printers
- They use high heat to fuse toner to the material.
- They aren’t compatible with materials like printable vinyl or printable iron-on due to the heat used in their printing process, though exceptions may exist depending on the printer model.
3. Suitable Printable Materials
- For Cricut Explore Air 2 and Older Models: Printing on reflective, glossy materials or darker colors can easily interfere with the machine sensors, making it difficult to read and eventually resulting in uneven cutouts. To avoid this, make sure to use only non-reflective matte white or transparent materials.
- For Cricut Joy Xtra, Explore, Maker, and Venture: Print on lightly colored or straight-up white and use simple pattern materials. Using dark-colored, highly glossy materials or those with holographic patterns may cause inaccuracies while scanning, resulting in failed cuttings.
How to Setup Print Then Cut in Cricut Design Space
After understanding the materials required, let’s move on to creating a project with Print Then Cut:
Step 1: Design Template in Cricut Software
- Open Cricut Design Space on any device, create a new project and select images. (You can also upload a design from the Cricut library.)
- However, if you are using your own image, you need to adjust it for Print Then Cut compatibility. (To do this, create a background layer using the “offset” tool, then flatten the layers to merge them into a single printable image.)
- Also, make sure your image size is within 9.2 inches.
- If your design involves any text, then consider changing the fill setting to “Print.”
Step 2: Print Your Design
- In Design Space, click “Make It” and follow the instructions.
- The prompt will guide you through selecting your printer and paper.
- At the end of the printing process, a black border will be printed around your design. It is crucial for the machine to scan properly and make the cuts according to the design.
Step 3: Load and Cut the Selected Design
- First, load the printer paper into the machine and align it properly with the black border and the mat.
- Next, select the material that you are using.
- Now, leave everything to the machine; it will automatically scan the printed design and register the markings for cuts.
- Lastly, unload the cutting design and check that it meets your requirements.
Troubleshooting Tips for Print Then Cut
Here are some troubleshooting tips if you are facing any issues during the use of the feature:
- If the image cutting is correct, check the mat and sensor for stains or particles. Clear them, then try again.
- Make sure the sensor light is working properly, and the blade is clean.
- Additionally, adjust the pressure settings and the blade type.
Conclusion
Print Then Cut is a powerful feature that opens up new possibilities for using the Cricut machine. It’s an easy way to print externally and cut with a Cricut machine. In the end, we hope you find this guide helpful and informative for learning “How to Print Then Cut on Cricut” Use the guided instructions to complete the Print Then Cut process on your own without any hassle. However, if you still
encounter any problems, we recommend reaching out to us. We are professionals who are dedicated to ensuring every individual achieves a seamless experience with the Cricut machine.
Frequently Asked Questions (FAQs)
How to Flip Text in Cricut Design Space?
Check out the steps given below to flip your text in Cricut Design Space:
- Select the text you want to flip on the Cricut Design Space canvas.
- Look for the “Flip” option in the Edit toolbar or the panel on the right side of the screen.
- After that, select “Flip Horizontal” to mirror the text horizontally.
- If you need to flip the text vertically, choose “Flip Vertical” instead.
How to Contour in Cricut Design Space?
To contour in Cricut Design Space, follow these steps:
- Choose the image or layer you want to contour in Cricut Design Space.
- In the Layers panel, locate and click the “Contour” button.
- The Contour window will display all the individual cut lines of the selected layer.
- Click on a cut line to toggle its visibility. If it’s currently visible, it will be hidden; if it’s hidden, it will be revealed.
- Once you’ve hidden the desired cut lines, click “Done”
How to Import an Image From Google to Cricut Design Space?
Learn how to transfer an image from Google to Cricut Design Space, consider the following steps:
- Go to Google and search for your desired image.
- Click on the image you want.
- After that, right-click on the image and select “Save Image As.”
- Now, open Cricut Design Space and start a new project.
- Choose “Upload” in the bottom left corner.
- Then, select “Upload image”.
- Click on “Browse” to open the file selector and find the image you saved from Google Images.
- Select the image and click “Open”.