You may be an aspiring crafter who often looks to create something unique and intriguing from scratch. The Cricut machine is an innovative cutting tool that makes crafting more enjoyable.
Cricut machines can help bring creative ideas to life with precision. Whether you are a beginner or a professional, the Cricut range offers different models to suit various needs. The Cricut machine, whether Cricut Maker 3, Explore 3, or Joy, can cut, write, and draw on a vast selection of materials. This includes cardstock, vinyl, iron-on vinyl, paper, leather, wood, and more.
If you are a newbie to crafting and want to learn ‘how to use Cricut machine‘, then you are in the right place. In this guide, we have discussed everything about setting up a Cricut machine and using it to create your first project. So, let us delve into it deeper.
How to Setup Cricut Machine?
Setting up your machine is a simple process. It involves everything from unboxing to connecting the machine and downloading/installing ‘Cricut Design Space‘. Here are the instructions on ‘how to setup Cricut machine‘:
Step 1: Unboxing the Cricut Machine Box
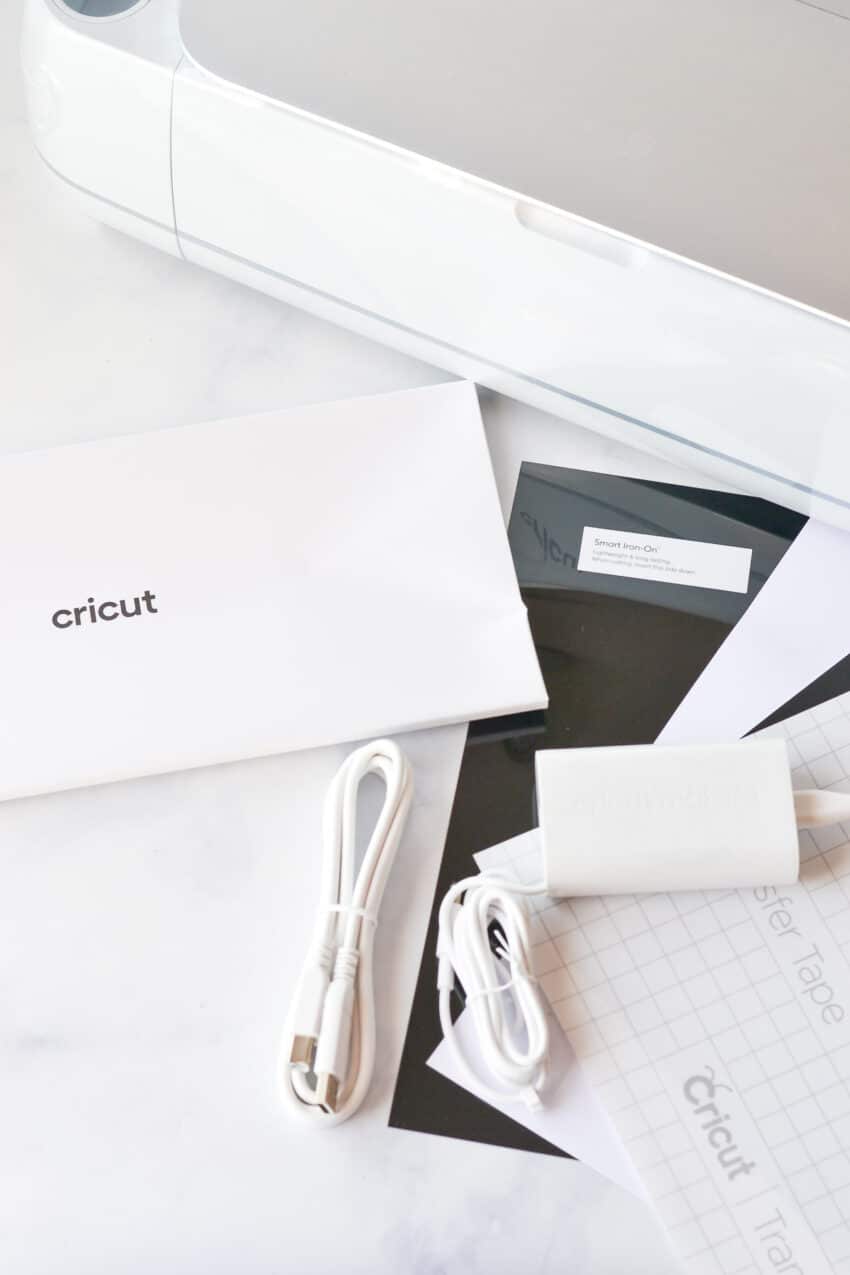
Let us start by unboxing the machine. For beginners, unboxing can be confusing, but it can be done precisely if there is proper guidance. When you open the box, you will get an envelope containing a setup guide, warranty info, and a piece of Smart Vinyl. You will need that vinyl for your initial test project, so keep it safe.
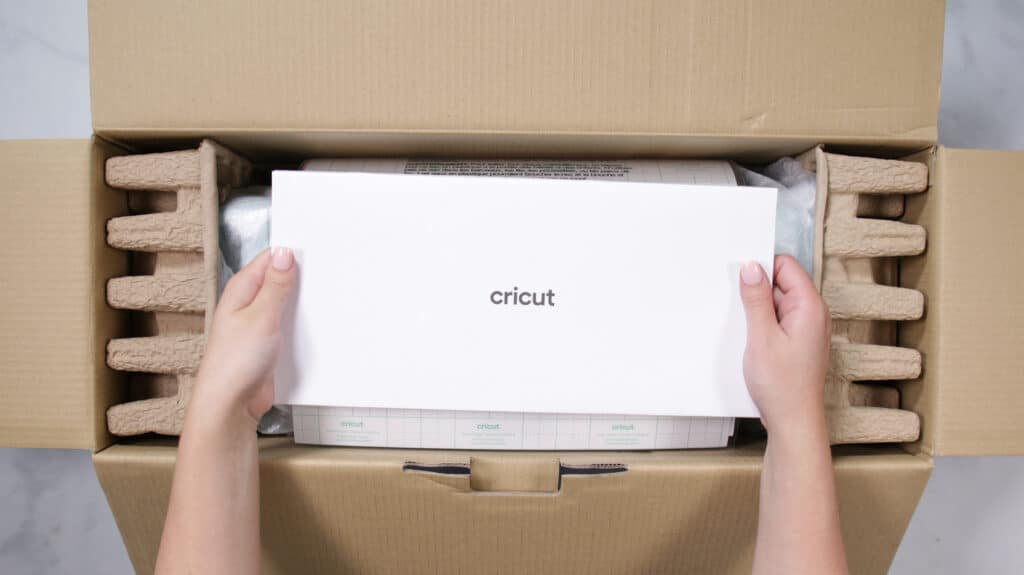
Once you have taken out the paper, you can pull out the cardboard buffers from the top. The machine is underneath, wrapped in plastic. Get a knife or a weeding tool to remove the plastic safely without scratching the machine.
Check what else is there inside the box. You may find a packet of some more Smart Materials. There may be a full sheet each of smart vinyl, iron-on vinyl, transfer paper, and smart paper. At the bottom, you can find a USB cable with which you will connect the machine to your desktop system.
Step 2: Connect Your Cricut Machine to a Device
After unboxing your machine, it’s time to connect it to your device.
Firstly, you must plug the power cord into the back of your machine. The next step is to plug the other end into a nearby circuit outlet.
Pull up on the lid of the machine. The front will automatically open. Remember to avoid pulling the front door forcefully. This may damage the machine, so let it naturally unfold slowly.
Take off the foam piece from under the clamps and hit the power button. The two clamps move to one side of your crafting machine, then back again.
Step 3: Download and Install Design Space
You are almost there now. The next step is to download and install Design Space on your device. If you already have the software installed on your computer, then that’s great. But if you don’t, search for the right download link on your computer and get the software.
Open your web browser and then head over to the official Cricut website (cricut.com/setup). It will automatically detect whether you have a Mac or Windows system.
When on the page, check the small square box next to I Agree to Cricut Terms of Use. Now, you will be able to click the Download button. Once you have downloaded Design Space, you will need to install it.
After that, another box will display on your screen to begin the installation process. Next, you have to click on the Cricut icon and drag it to the Applications icon. Click twice on the Applications icon.
This will take you to the application screen. Here, you will have to locate the Cricut software icon once more and double-click on it.
Tap on the Open button to finalize the installation. Now, you can finally Set up your machine or log in to your account.
You will see a Design Space icon on the desktop. Next, drag the application icon to the dock if you need a shortcut.
Here is how you need to log in to your Cricut Design Space:
- Open the Design Space software. Click Sign In.
- Fill in the email address or Cricut ID.
- Enter the password and click Sign In.
Must Read : How to Connect My Cricut to My Laptop? (Complete Tutorial)
How to Use Cricut Machine to Create Your First Project?
Since you have set up the machine and have installed the Design Space program, you can now start with your first project. No matter which Cricut model you have, you will get everything that you need to get started with your first project. Along with the machine, it will have:
- Rotary Blade + Drive Housing
- USB Cable
- 12″x12″ FabricGrip Mat
- 12″x12″ LightGrip Mat
- Fine Point Pen, Black
- Premium Fine-Point Blade + Housing
- Power Adapter
- A Welcome Book
Ensure you have all the necessary equipment and that your computer or mobile is connected to the internet. Follow these instructions to do your cutting the right way:
- First of all, choose a design in Design Space. Next, select the cutting material and place it on the sticky cutting mat.
- After that, you choose the correct material settings in the Design Space app.
- Next, send the designs to your machine. Press the blinking button on your machine, and it’ll start the cutting.
Wrap Up
That’s all for this guide on how to use and setup a Cricut machine. You may also want to know the total timespan that it’ll take to set up and do the first project.
It may take anywhere from 60 to 90 minutes to do everything. Setting up the Cricut machine would hardly take about 15 to 20 minutes. Executing your first crafting project may take around 30 minutes, including a waiting period for the machine to do its thing. Also, it may take about 30 minutes to make the luminary.
The Cricut machine is an excellent cutting tool for beginners and expert crafters. You will experience a whole new level of crafting. Follow everything that is discussed above for a seamless setup process. Login successfully and make the most of your Cricut.
Stay connected with us for more such information. Keep exploring!